Informatica MDM Data Load Overview
Create Mappings
|
Note: |
The procedure listed below for creating mapping in Informatica MDM is also applicable for HCP, HCO and Egress. |
Perform the below steps to create Mappings for OK US/GBL HCO and HCP, Relations Data and Egress.
-
Login to the Informatica Cloud with the valid login credentials.
-
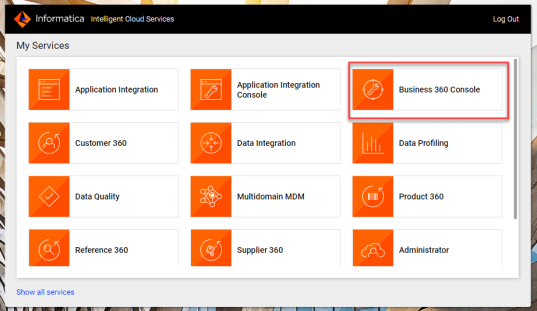
The My Services screen appears as shown below.
-
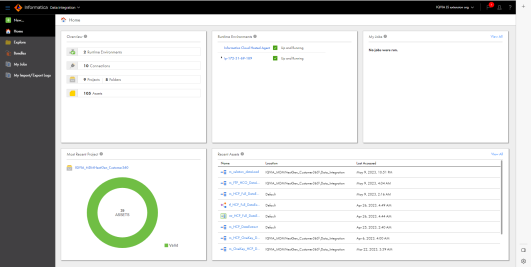
Click Business Integration. The Home screen of Business Integration appears as below.
-
Click Explore to open the Projects.
-
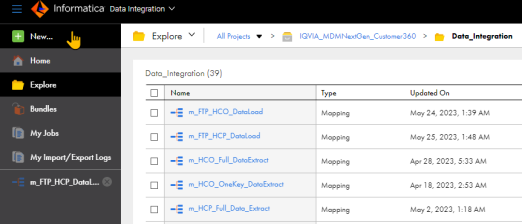
From the list of projects, click IQVIA_MDMNextGen_Customer360 and then open the Data Integration folder.
-
All the mappings created are stored in Data Integration folder. See figure below.

-
To create a new mapping, click NEW from the top left of the screen as shown in the below figure.
-
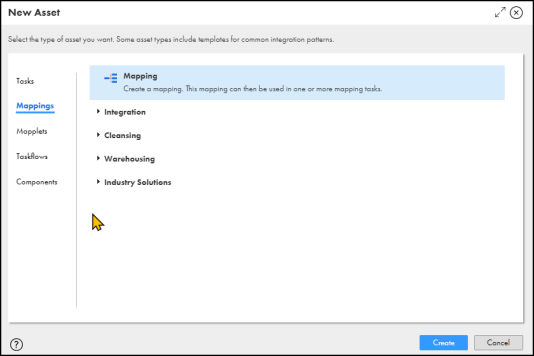
A page appears as below. Select Mappings and then click Create.
-
A Mapping is created with the default name as Mapping 1 as shown below.
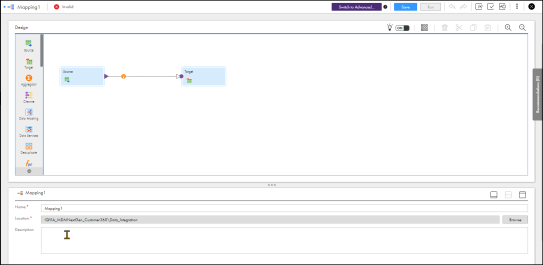
-
The Source and Target are given by default in the Design section.
Configure the Source
-
Select the Source and then enter the properties which appears at the bottom of the screen.
-
Refer to the table below to configure the Source properties.
Tab Description General The General tab will have the Name and the Description fields. Enter the necessary details. Source The Source tab contains Connection and Source Type fields with an option to add a New Connection and New Parmeter. See the figure below:
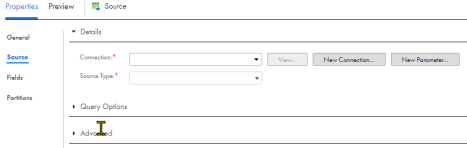
Note:
Target object for HCP or HCO data load should be selected from home > Custom Assets > Business Entities.
Target object for Relation data load should be selected from home > Custom Assets > Relationships.
-
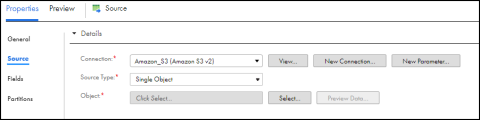
From the drop-down menu, select the type of Connection that you want to map and then select the Source Type as Single Object.
-
When you select the Connection, the Object field appears.
-
Click Select and choose the CSV file object that you want to configure.
Configure the Target
-
Select the Target and then enter the properties which appears at the bottom of the screen.
-
Refer to the table below to configure the Target properties.
Tab Description General The General tab will have the Name and the Description fields. Enter the necessary details. Source The Source tab contains Connection and Source Type fields with an option to add a New Connection and New Parmeter. See the figure below:
Field Mapping You can define the field mappings in this tab. Drag and drop the Incoming fields to the Target Fields. -
From the drop-down menu, select the type of Connection (In this case, we are using B360 FEP Connector) that you want to map and then select the Target Type as Single Object.
-
Click Select and choose the object that you want to configure.
-
From the operation drop down, select Upsert (Update or Insert).
-
Click Add to specify the update columns for the target object. Select fields of the target object to be used as the update columns.
Configuring In-Out Parameters
While loading the data to Information MDM, you need to configure the in-out parameters. Select the fields as shown below.
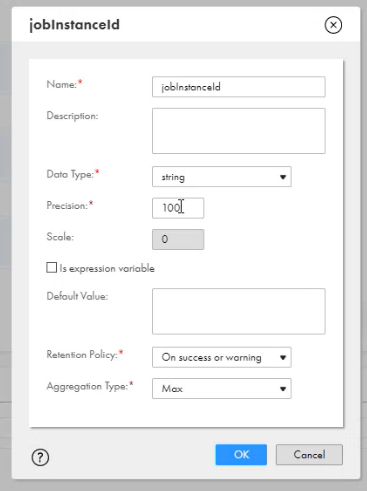
|
Note: |
The name jobinstanceid is case sensitive and must be entered as given in the figure below. |
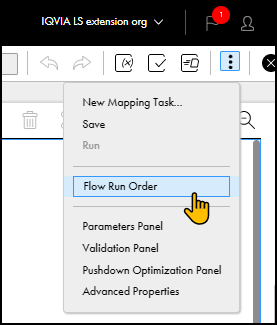
Flow Run Order
-
Make sure to arrange the Flow Run Order of a mapping.
-
To configure the flow order, open a mapping and click the three dots at the top right corner and then click Flow Run Order from the dropdown as shown below.
-
Configure the Flow Order and then click Save.
Mapping Task
Once you create a Mapping with a Source and a Target, you must create a Mapping Task and Task Flow.
-
Open the Mapping to which you want to create Mapping Task.
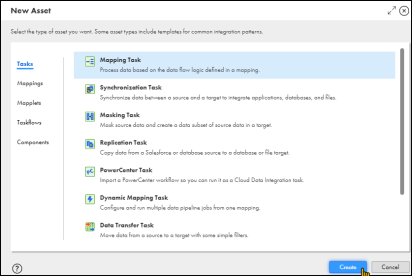
- To create a new mapping task, click NEW from the top left of the screen.
- A page appears as below. Select Tasks and then click Create.
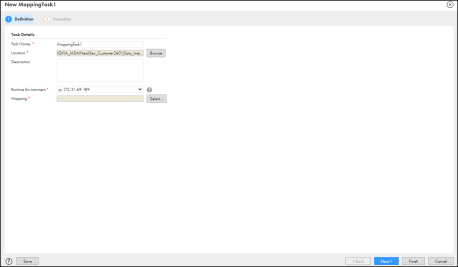
- A page appears as below. Enter the Task Name and select the Location.
- Enter the Runtime Environment details and then click Finish.
Create and Publish a Task Flow
After creating a Mapping and its Mapping Task, you need to create a Task Flow. Do as below to create a task flow.
-
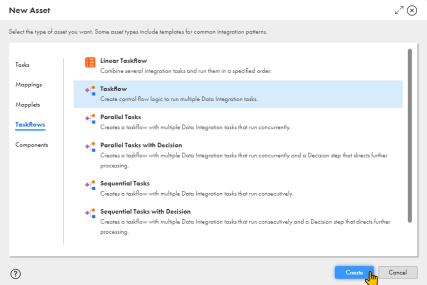
To create a new task flow, click NEW from the top left of the screen.
-
A page appears as below. Select Taskflow and then click Create.
-
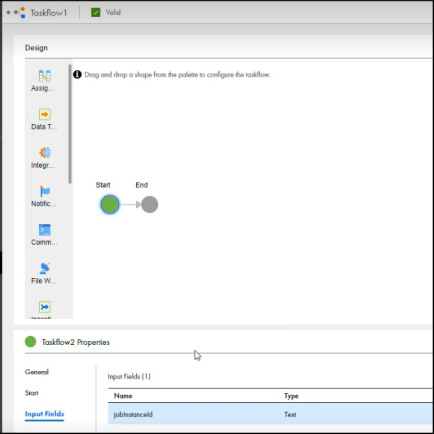
A taskflow is created with a Start and an End object.
-
Click Start and then enter the values as required in the properties tab displayed at the bottom.
-
In the Input Fields, enter the Jobinstanceid. See figure below.
-
From the design panel, drag and drop the Data Task between Start and End objects.
-
Click on the Data Task to add the associated Mapping Task to the task flow.
-
In the Input Fields, enter the Jobinstanceid as a new field.
-
Once you have entered all the required fields, Click Publish to publish the Task Flow.
Create a Job
-
Login to the Informatica Cloud with the valid login credentials.
-
On the My Services screen, click Business 360 Console.
-
From the navigation pane, click New and click Jobs as shown in figure below.

-
Click Create and then select the Job that you want to create. Enter the details and then click Create. See figure below.

-
Enter the required fields and then click SAVE and then RUN to execute the job.
-
For ingress job select Ingress from dropdown and click Next. The Demo Ingress window appears.
-
Select process type as MDM Ingress.
-
Select Source system from the drop down. (The selected source system is the source system for the imported records). See figure below.

-
Add the task flow created at the previous step. (This task flow must be mapped to load the data in MDM).
|
Note: |
All the Task flows added here will run parallel to each other. |
For an egress job select egress from the dropdown and click Next.
-
For a egress job select egress from the dropdown and click next
-
Select required Process
-
select export type
Standard export for delta
-
Customer export for date-based export.
-
Export all is for exporting all the data.

-
Add Taskflow. This task flow should have the mapping created to export data out of MDM.
-
All the Taskflow added here runs parallelly).
-
Click save
-
Click Run, if you want to run the job from informatica UI.